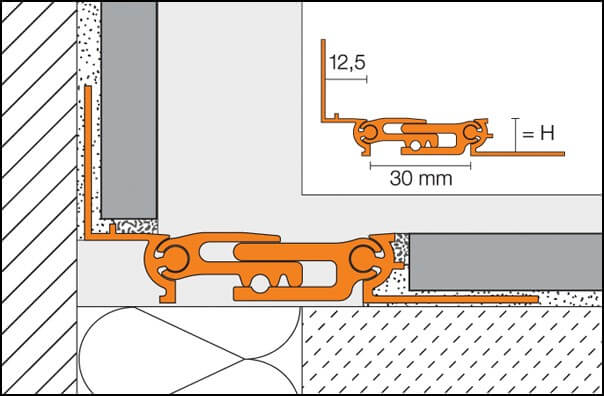
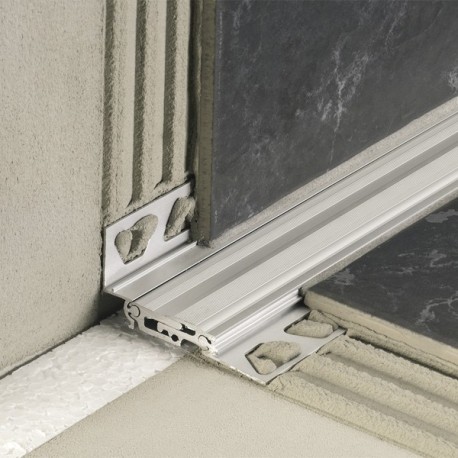
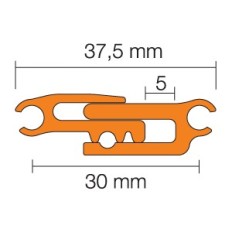
Maintenance-free aluminum structural expansion joint. The profile is designed in such a way that the lateral fixing wings can be anchored in the cement layer underneath the tile or natural stone covering, or if another type of covering material is used, such as carpet or synthetic floors, it can be integrated into the floor layer. In this way the profile can follow the movements of the cladding structure. The existence of a movable central coupling piece makes possible the absorption of movements of ± 5 mm. The articulated lateral shapes allow a three-dimensional absorption of movement.
The Schlüter DILEX-BTO structural joint provides effective protection to the edges of floors that support heavy pedestrian or truck traffic and other industrial vehicles. For all these reasons, they are ideal for, for example, being used in warehouses or production halls, shopping centers, airports, railway stations, underground parking lots or for floors that are cleaned with machines.
Material
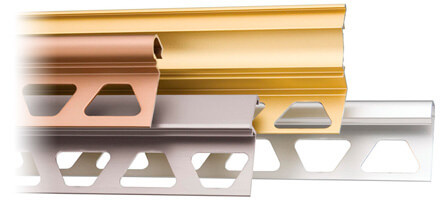
The profile is supplied in the following finishes:
- A = Aluminum
- AE = Alu. natural matt anodized
Material properties and application areas:
The suitability of the planned profile model should be analyzed in certain cases, depending on the chemical, mechanical, etc. requirements. that you have to deal with.
Installation
- When choosing the DILEX-BTO structural joint profile, be based on the thickness of the tile.
- Apply tile cement with the help of a serrated spatula where you want to place the profile.
- Press the DILEX-BTO structural expansion joint with the trapezoidal-pierced locking wing onto the cement bed, then give it the desired orientation.
- Completely cover the fixing wing with trapezoidal perforation with tile cement.
- Press the attached tiles, positioning them so that the upper edge of the profile is at the same level as the tile (the profile cannot be above the surface of the covering, on the contrary up to 1 mm below). In the profile area, the tiles must be laid in their entirety. Always lay the uncut side of the tile touching the profile.
- The tile will be placed touching the lateral spacer stop, thus guaranteeing the existence of a constant 1.5 mm joint.
- Fill the gap between the profile and the tile completely with filler cement, and then remove the protective film from the profile.
- When inserting it into the screed layer, you must previously make cement strips of the necessary height on both sides of the joint, which will be separated by an insulating strip.
- On the cement strips, a contact layer made with water-setting adhesive mortar or cement grout is placed.
- Place the DILEX-BTO expansion joint on the contact layer, orient it and tap with the mallet to enter it.
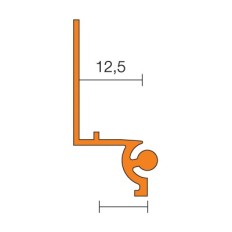
- The height of the screed surface must allow the surface of the covering to be laid to be exactly on the same level as the top edge of the profile. The height of the profile should be chosen so that the fixing wing is covered approximately 15 mm by the screed layer.
- The handling of DILEX-BTO on ceilings or walls follows the same guidelines as for its installation on the floor.
Indications
The DILEX-BTO structural joint profile does not require any special maintenance. The oxide layer on the aluminum can be removed by standard polishing products, although it will re-form over time. Deteriorations of the anodized layers can only be removed by repainting.


